Serato appears to have made a conscious decision to make mapping MIDI controllers simple, and it is somewhat at the expense of power. For instance, mapping a MIDI control to more than one Scratch Live function isn’t possible… but to mitigate that, Serato have integrated the Super Knob and Ultra Knob concept. They’ve also made it impossible to map buttons to dials and vice versa, but their way of working provides a loose workaround for the effects you might want to achieve by performing such a thing.
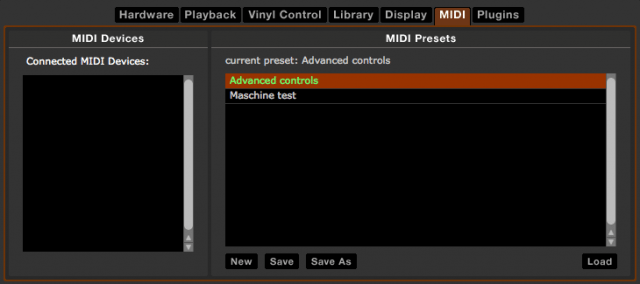
Important! Before you start, go into the MIDI page of the setup window and create a new MIDI preset. After you’ve made changes, save. If you don’t do this, all your hard work will be lost when you quit. Not fun.
BUILT-IN SMARTS
Scratch Live’s effects sit somewhere between Traktor’s group and advanced modes, with two assignable banks of three effects that can each be expanded to show their advanced controls. So, whilst Scratch Live only has two banks maximum, each bank has three effects that are always highly configurable – here are some advanced tips for creating effects behaviours.
The super knob concept allows you to create relative relationships between an effect’s main dial and its advanced parameters. The ultra knob goes a step further and allows you to create the same relationships between the three main effect knobs and an ‘omni knob’ for each bank. Here’s how:
- Click the expand button (pictured) to show an effect’s advanced controls.
- Now, press the newly visible pencil button, which will open up the relationship controls.
- Move the dial to where you want it to be when the main dial is fully anticlockwise (‘off’) and press the ‘-‘ button.
- Now move the dial to where you want it to be when the main dial is fully clockwise (‘on’) and press the ‘+’ button.
- Make sure the link button is engaged.
Now when you turn the main dial, the advanced dials will turn the amount you’ve set up. If you set the controls to the opposite of the main dial – so that the advanced dial turns clockwise when the main dial turns anticlockwise – then the ring around the dial will be red instead of green.
PUSHING THE ENVELOPE
The super knobs and ultra knobs are obviously very powerful, but using Scratch Live’s native capability we’re limited to just one super knob per effect or one ultra knob per bank. If we use our MIDI intermediary software we can create as many as we like.
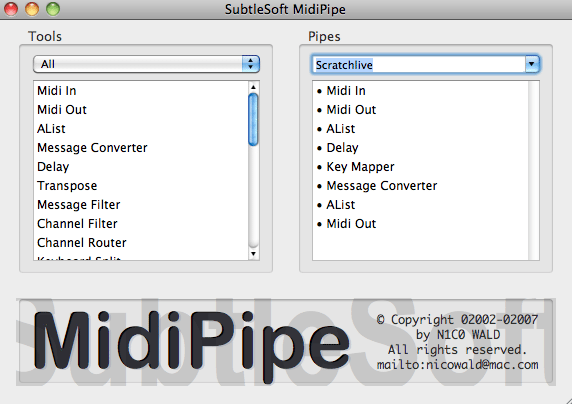
In testing, I learned two things about how Scratch Live treats MIDI input. Firstly, it’s got no issue with commands coming in simultaneously and so we don’t have to worry about creating delays between our message splitting. Secondly, it won’t learn the second in a string of MIDI commands even if you do put a delay in, so it’s necessary to build the MidiPipe template up with these steps:
- Set up a MIDI in in your MIDI software.
- Set up a MIDI out to go to ‘Scratch Live MIDI in’ in the software, and ensure that ‘pass through’ is enabled.
- ‘Learn’ the first command in Scratch Live.
- Add a message converter, change the CC of your control to something else (it’s a good idea to plan out what you’re doing to avoid a mess down the road) and put it after the first MIDI in in your MIDI software.
- Now that the control has been switched, go back to Scratch Live and learn the next command.
- Return to the MIDI software and move the message converter to the end of the pipe, adding another MIDI out after it.
- For extra controls, repeat from Step 4.
THE NON-EFFECT EFFECTS
Scratch Live doesn’t count censor or loop roll as effects – this means that they can be used without taking up a slot in your DJ-FX rack. Whilst that’s all good, it also means they can’t be hooked up to super or ultra knobs, and so if we want to use them to their full potential we need to get a little creative with MidiPipe or the equivalent.
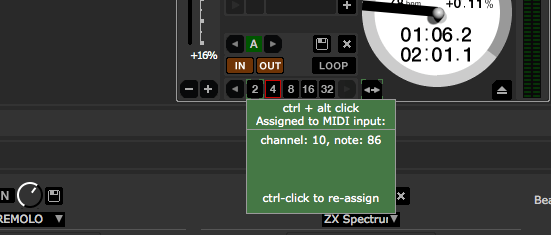
Here’s a trick that, whilst not super new, may have passed you by: instead of mapping a single loop roll button, you can map as many as you like to individual loop roll lengths by pressing ctrl+alt+click on the loop button in MIDI mode.
In a similar shortcut to the loop roll trick mentioned above, you can also ctrl+click on the effects activation buttons to turn them into momentary triggers. Try assigning loop roll activation and effects activation to the same button by creating a basic key mapper MIDI pipe and using these hidden momentary press controls for some very cool effects!
As a final note, because censor’s a button and Scratch Live doesn’t allow buttons to be triggered by specific values of CCs, we have to do some jiggery pokery in our MIDI software and turn our CC message into a note message. I use MidiPipe often because it’s very quick and easy to use, but when it gets to the more complicated actions, Bome’s Midi Translator Pro is the way to go. What we need to do is tell Midi Translator to turn only the final value on a single CC message (127, or 7F in hex) into a note on message, and also that the next one below (126, or 7E in hex) into a note off message. This will allow us to create a knob that can be assigned as we wish, but at the very end of its throw also sends things into reverse!


No comments:
Post a Comment