On the surface, Ableton Live’s drum racks seem to be surplus to a DJ’s requirements with clips being able to deal with everything we need. Look a little deeper, though, and that’s not the case; let’s look at where we can use drum racks to our advantage.
One of the biggest advantages to using Ableton Live is its flexibility. Whilst it can’t quite boast the straight to business simplicity of Traktor, Torq, Itch, and the like, it’s got a clear lead when it comes to setting things up how you want; there’s so much choice that sometimes knowing what tools to use where can be a bit confusing, and drum racks are definitely one of the more specialised tools.
Clips
There are advantages to using clips, and there are also advantages to using drum racks. First off, let’s look at what using clips is perfect for anyway.
• Available in all versions of Live
• Great for full tracks and loops
• Good for quantising
• Great for full tracks and loops
• Good for quantising
Clips are a lot more flexible than you may have realised. Despite defaulting to the global quantise settings and acting like loops, clips can be set to be more or less independent. To use a clip as a one shot, simply go to its launch settings and turn both quantisation and warp off. In doing this, you can set some clips up to play tracks, others to play loops, and throw one shots into the mix as well.
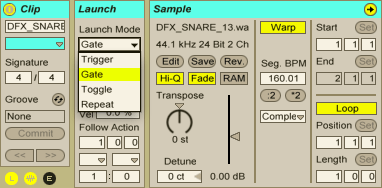
There are some important limitations to consider when using clips, though, that by using drum racks we can overcome:
• Only one clip can play in a track at a time
• Clips between different tracks can’t ‘interact’
• One shot clips can’t be put into MIDI loops
• Editing options for audio clips is limited
• Clips between different tracks can’t ‘interact’
• One shot clips can’t be put into MIDI loops
• Editing options for audio clips is limited
Drum Racks
Drum racks are included in all versions of Live 8, but they are only editable in the full version. That caveat aside, let’s take a look at the pros of drum racks.
• Great for single hits and kits
• Can have a MIDI clip assigned to them for sequencing
• Simpler and sampler are more capable for editing than audio clips
• Can have a MIDI clip assigned to them for sequencing
• Simpler and sampler are more capable for editing than audio clips
Because only one clip can play simultaneously in a track, setting up a bunch of one shots to trigger will spread across your clip view quite quickly. This is not only messy, and a bit of a waste of precious screen real estate, but can also be a bit of a puzzle because of the ambiguity about what’s controlling what on your controller. In reality, a drum rack is just a container for audio/instrument tracks, and the rack can be expanded to show them as such (although MIDI clips can’t be stored in the within individual rack tracks), but the grid view that the rack uses is much easier to align with pads and buttons of controllers.
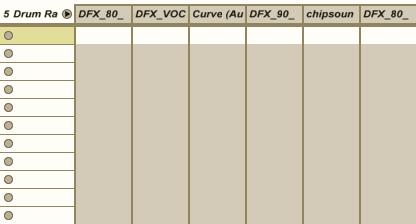
Another advantage to using a drum rack to trigger samples is that MIDI clips can be recorded into the main track, allowing all the samples and devices in a rack to become one big instrument – this is something that can’t be done if you use clips to trigger sounds.
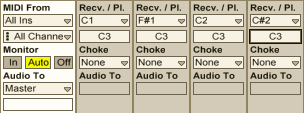
Drum racks default to triggering instruments at C3, which may not be what you want. To change this setting, expand the drum rack track to show all of the tracks within, and you’ll see the receive/play section, which you can alter as you see fit. You’ll also notice a choke setting; 16 flexible choke groups are another advantage to using drum racks.
Hot Tips
• Although it may seem like a bottomless pit of expenditure, to get real control over your samples you’ll need to get hold of Sampler, Ableton’s ‘step up’ sample player from the bundled Simpler device. Simpler’s still plenty powerful enough for the majority of tasks, but one thing it can’t do is set samples to one shot. The workaround? Increase the release time on your sample to ensure it plays out fully.
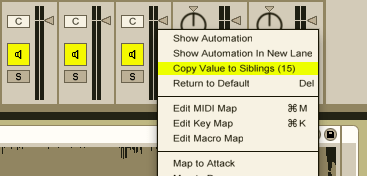
• When you’re working on your sounds, rather than tiresomely doing the same thing over and over again you can right click on a device control and select ‘copy to siblings’ to copy the setting across to all the other drum pads that share the same instrument.
• The name drum rack is slightly misleading: don’t feel restricted to drums! Whilst the drum racks are by nature a percussive tool, loading in instruments, perhaps combined with MIDI effects like arpeggiator, can give you a handful of different sounds all on one MIDI track that you can dip into with much more flexibility than an audio track.
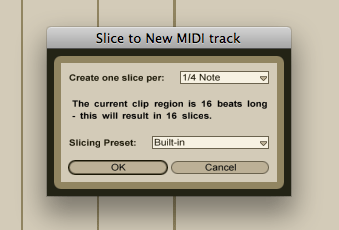
• Want to chop up a sample, MPC style? Instead of using clips and editing the start points manually (which can take forever!), take advantage of a not quite hidden, but not front of stage feature of drum racks. Simply right click a clip and choose Slice to New MIDI Track to bring up a dialogue box that will allow you to use timing or warp marker info to chop a sample up in a drum rack of Simplers. Simple!
The most important thing to glean from this article is that the best way to use Ableton Live is to mix and match its myriad features into something that works for you! Clips will almost certainly be your workhorse tool for the structure of a Live set, but the strengths of drum racks can take your performance to the next level. When mapping your controller, consider working your clip launch MIDI around a grid of MIDI notes and making sure that you always use those notes in drum racks so that when you switch between them everything stays a finger press away. This way you’ll get to have your cake and eat it too. Good luck!

No comments:
Post a Comment